Assigning sessions to students
Here's a summary of the key steps and options involved in the assignment process:
- Selecting a Class and Opening the Course:
- Choose the class you want to work with and open the respective course.
- Navigate to the story.
- For 2-5 you will need to go through the Themes.
- For 6-8 you will need to go through the genres.
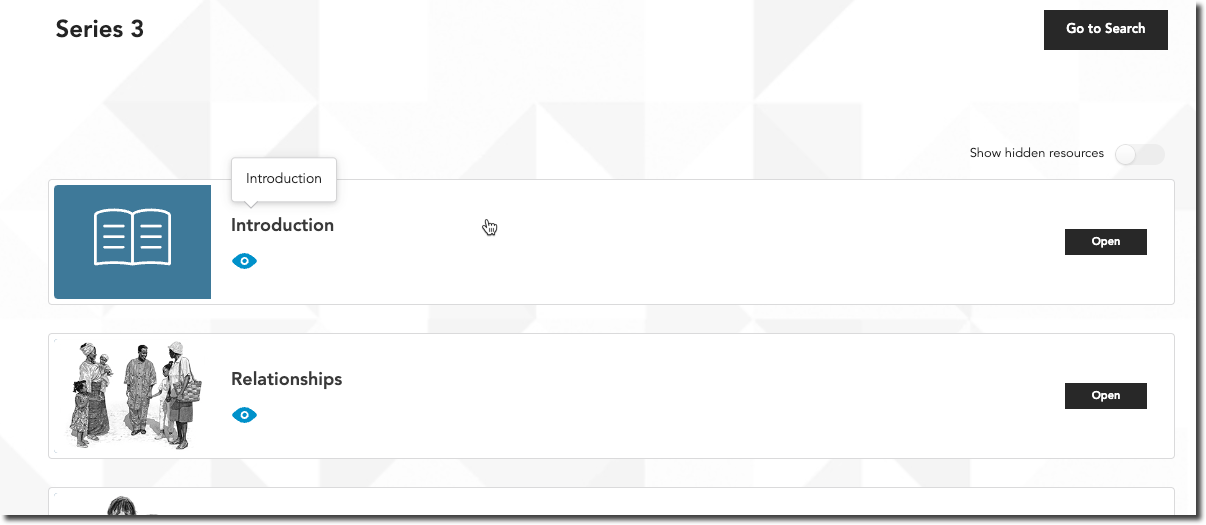
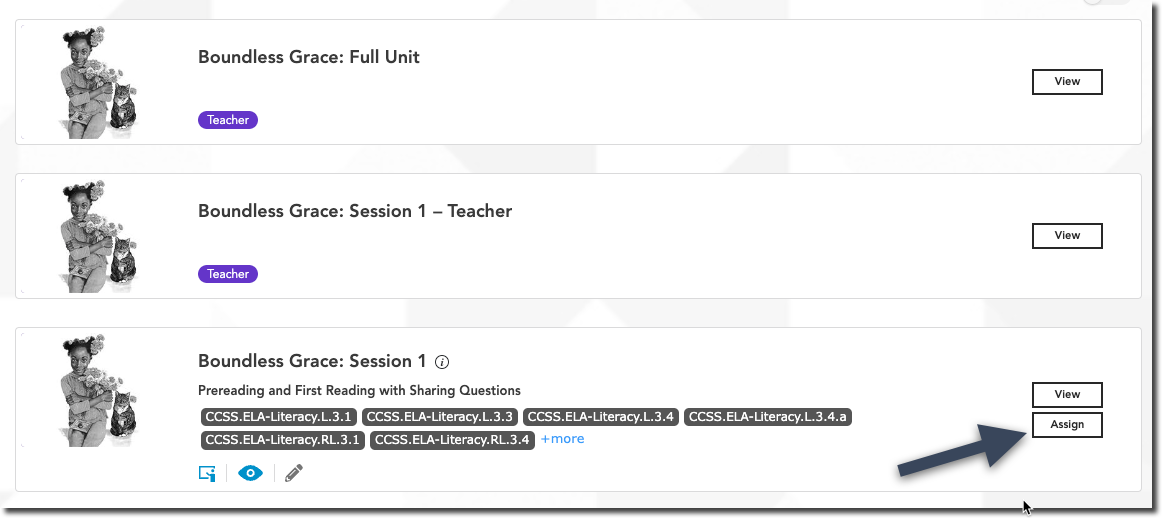
- Navigating to the Session to Assign:
- Find the session you wish to assign within the course.
- Find the session you wish to assign within the course.
- Assigning the Session:

-
- Click on the Assign button for the selected session.
- Note that only student-facing sessions can be assigned.
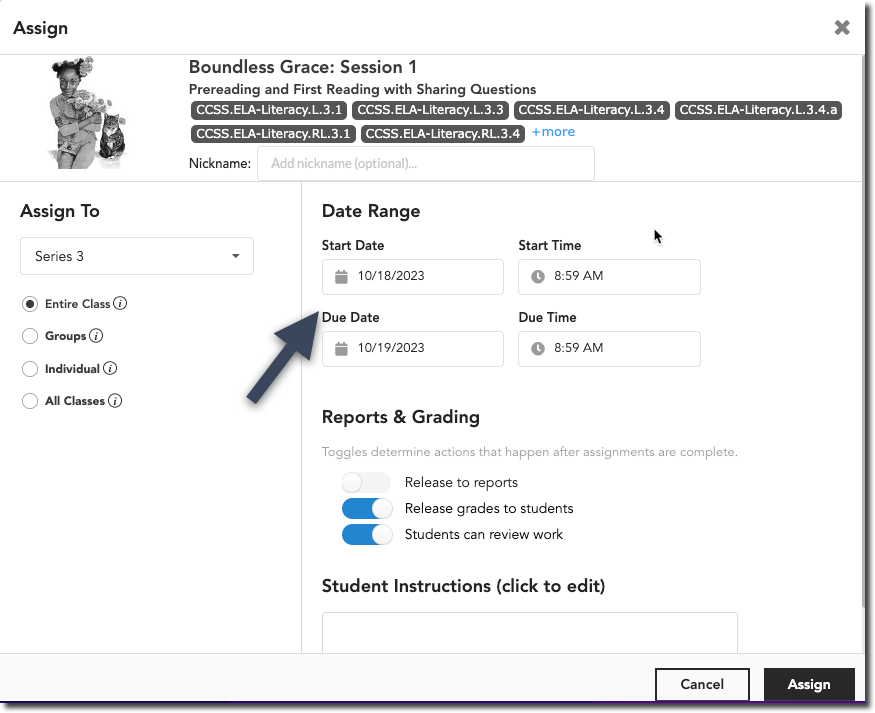
5. Selecting Assignment Recipients:
-
- Choose who will receive the assignment from the following options:
- "Entire Class (One Assignment for All)": Sends one assignment with the same instructions and due date to every student in the class.
- "Entire Class (Individual Assignments)": Sends individual versions of the assignment to every student in the class, allowing for individualized instruction, different due dates, or excluding items from grading.
- "Individual": Allows you to send the assignment to one or a few specific students in the class. When “individual” is selected, a drop down list of students will appear. Select the student.
- "All Classes": Sends the assignment to students in more than one of your classes that are using the course.
- "Entire Class (One Assignment for All)": Sends one assignment with the same instructions and due date to every student in the class.
- Choose who will receive the assignment from the following options:

-
- Enter the start date and due date for the assignment. The assignment will close on the due date at the specified time and no longer be accessible by your students.
-
- Customize the Reports & Grading settings using toggle switches:
- "Release to reports": Decide whether the assignment should be included in your standards and course reports.
- "Release grades to students": Choose whether students can see their grade on the assignment.
- "Students can review work": Determine whether students can review the assignment after it has been graded.
- Customize the Reports & Grading settings using toggle switches:


- Adding Student Instructions (Optional):
- Include any necessary instructions for students.
- Assigning the Session:
- Once all the information is entered, click the black Assign button at the bottom of the pop-up window.
- Notes on Future Assignments:
- If you create an assignment with a start date in the future, the assignment will remain in Locked status until that date, meaning students cannot view or open it until then.
- Partial Session Assignments:
- If you want students to complete only some of the items in a session, you can assign the full session and student instructions on which items to complete. You can then exclude the items you asked them to skip in the Gradebook.
These instructions provide a clear overview of how to assign sessions and manage various assignment settings within the Junior Great Books Digital Classroom platform. If you have any further questions or need additional assistance, please feel free to ask customer.service@greatbooks.org.